
Installing GLPI on Ubuntu 20.04
This post will take you step by step how to install GLPI on Ubuntu 20.04. The installation process for GLPI is pretty straight forwards and can be done with the following Steps:
1. Upgrade and Update Ubuntu
Before we begin the installation of GLPI we need to first make sure that Ubuntu is up to date by running the following commands on the server:
sudo apt update -y && sudo apt upgrade -yOnce the update and upgrade has finished move onto step 2:
2. Install MariaDB database server
Install MariaDB from apt by running the following command:
sudo apt install mariadb-serverMake the installation secure by running:
sudo mysql_secure_installationOnce the Installation is complete log into your database with the root user:
sudo mysql -u root -p

UPDATE mysql.user SET plugin = 'mysql_native_password' WHERE User = 'root';
FLUSH PRIVILEGES;
QUIT;
Create a user and database for GLPI:
mysql -u root -p

CREATE DATABASE glpi;

CREATE USER 'glpi'@'localhost' IDENTIFIED BY 'DBPassword';

GRANT ALL PRIVILEGES ON glpi.* TO 'glpi'@'localhost';

FLUSH PRIVILEGES;

EXIT;
3. Install PHP and Apache
Run the following command to install PHP and Apache:
sudo apt-get install apache2 libapache2-mod-perl2 libapache-dbi-perl libapache-db-perl php7.4 libapache2-mod-php7.4 php7.4-common php7.4-sqlite3 php7.4-mysql php7.4-gmp php-cas php-pear php7.4-curl php7.4-mbstring php7.4-gd php7.4-cli php7.4-xml php7.4-zip php7.4-soap php7.4-json php-pclzip composer php7.4-intl php7.4-apcu php7.4-memcache php7.4-ldap php7.4-tidy php7.4-xmlrpc php7.4-pspell php7.4-json php7.4-xml php7.4-gd php7.4-bz2After installing all these packages, edit the php.ini file (/etc/php/7.4/apache2/php.ini):
sudo vim /etc/php/7.4/apache2/php.iniAnd change the time zone, memory limit and file upload size as given below:
memory_limit = 512M
post_max_size = 100M
upload_max_filesize = 100M
max_execution_time = 360
date.timezone = Europe/London
4. Download and Install GLPI
Download the latest stable release of GLPI. It follows a semantic versioning scheme, on 3 digits, where the first one is the major release, the second the minor and the third the fix release.
Check for the latest stable release on the Downloads page. As of this writing, this is 10.0.6.
Install wget by running:
sudo apt-get -y install wgetSet the version number to be installed by running:
export VER="10.0.6"Download GLPI 10.0.5 by running:
wget https://github.com/glpi-project/glpi/releases/download/$VER/glpi-$VER.tgzOnce the installation file has been downloaded, extract the downloaded archive by running:
tar xvf glpi-$VER.tgzMove the extracted glpi director /var/www/html:
sudo mv glpi /var/www/html/Give apache user ownership of the /var/www/html/glpi directory and all of its contents:
sudo chown -R www-data:www-data /var/www/html/glpi5. Finish the GLPI installation
The rest of the installation needs to be done from the web browser. If you are on the same machine as the glpi installation got to http://127.0.0.1/glpi/install/install.php if you are installing glpi on a remote machine go to http://serverip/glpi/install/install.php
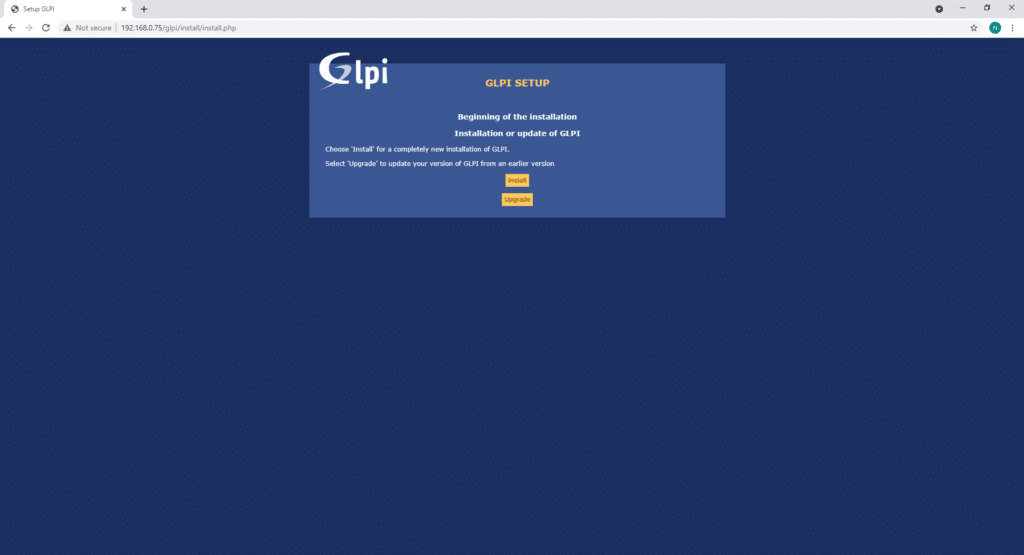
This will bring up the following page:

Select you language and click the OK button this will bring the following screen:

Accept the license agreement and click Continue:

Click Install:
This will show any issues that need fixing:
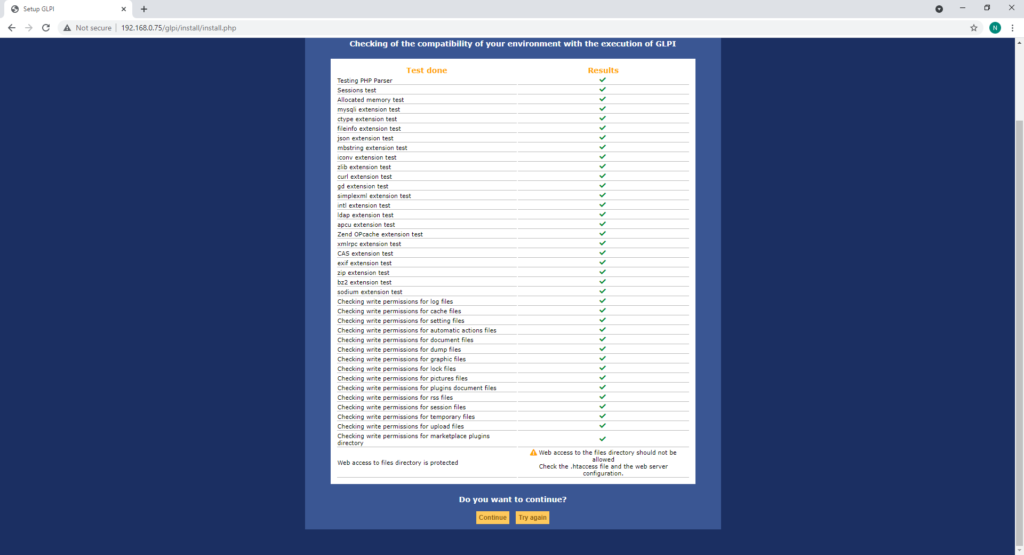

To fix the error about Web access edit the /etc/apache2/apache2.conf file so that the following text is changed from:
Options Indexes FollowSymLinks
AllowOverride None
Require all granted
To:
<Directory /var/www/>
        Options Indexes FollowSymLinks
        AllowOverride All
        Require all granted
</Directory>
Save the changes and restart Apache2 with:
sudo service apache2 restartNow there are no-more errors:

Click Continue.

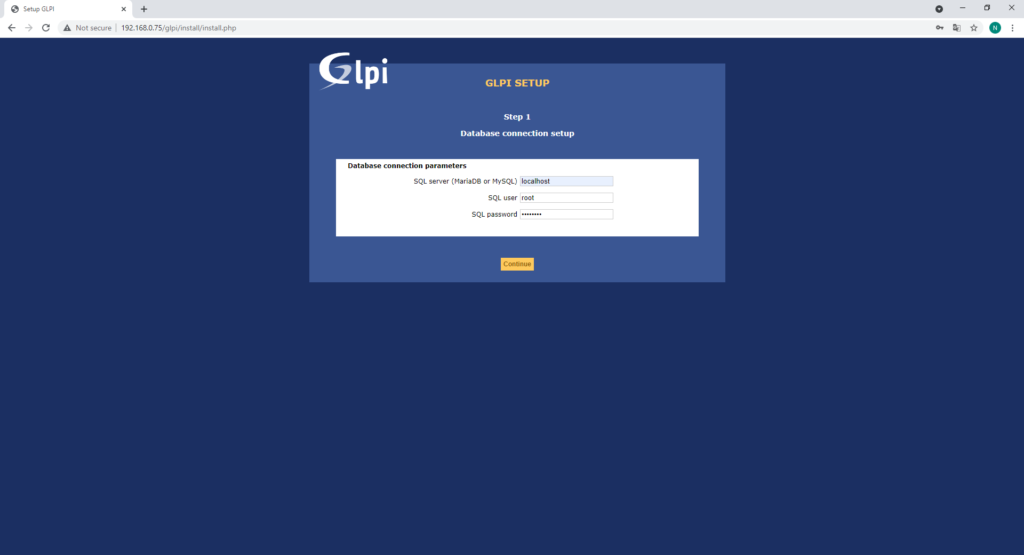
Add the details of the root user and press Continue:
Select the GLPI database and click Continue:

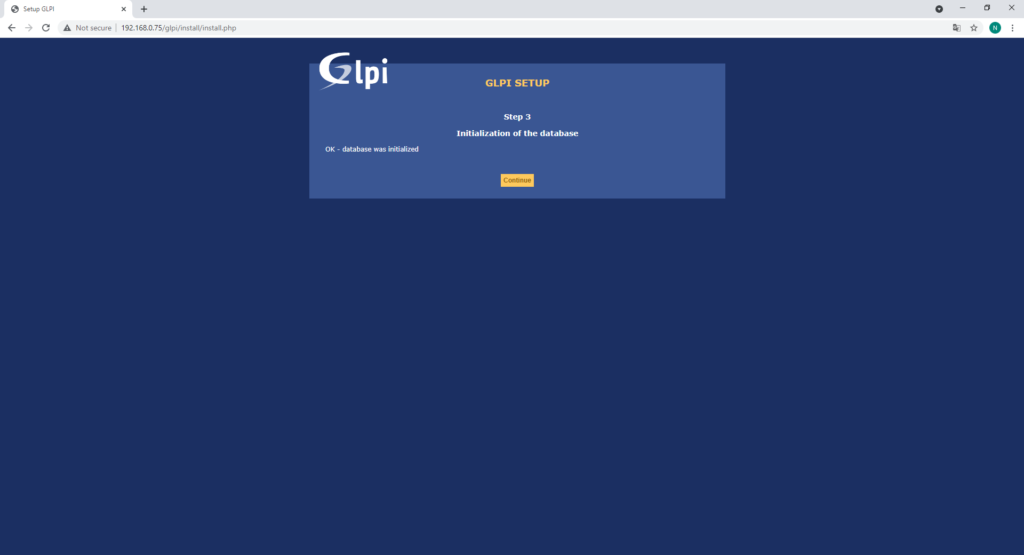
Wait for the database to initialize:

Click Continue:
Untick Send “usage Statistics” and click Continue:

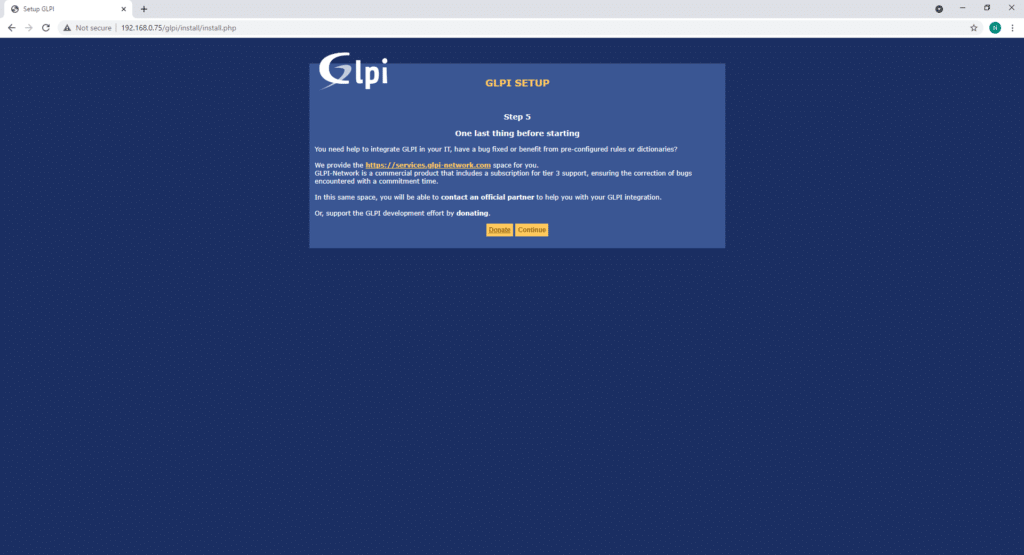
Click Continue again:
The installation is now complete. click on use GLPI to access GLPI:

Log in with one of the glpi user and click Post:
You will now be logged into GLPI and on the dashboard:

Go to this post to learn how to change all of the default user passwords and to remove the install.php file to clear the orange banner at the top of the page.